Making yogurt out of chickpeas does not quite sound like the dairy alternative we’ve all been hoping for. But it ticks a few important boxes. It’s soy- and nut-free, a natural source of protein and also probiotic. All of this makes a combination that’s not easy to come by on a plant-based diet.
Three of the big issues with contemporary dairy alternatives are that the main ingredients are either imported from far away (soy & nuts), are major allergens (soy & nuts) or that the yogurt contains some form of emulsifier to achieve a creamy texture. Since chickpeas can be grown locally and also contain enough starches to naturally thicken the a liquid, chickpea yogurt could make a much more allergen- and environment-friendly substitute.
Flavour
How does it taste though? By itself, it won’t compete as a yogurt alternative. That’s because there’s no fat to carry flavour. And since it’s made from chickpeas, there’s also no need to deny the subtle chickpea taste. Not quite something we’d want from a soothing yogurt. Nonetheless, it’s versatile and can easily be turned into a sweet dessert or savoury dip, which I share in the recipe below.
Fermentation
I first tried making chickpea yogurt after watching this video by Priyanka. She follows a slightly different method, where she uses the soaking water from the chickpeas to kickstart the fermentation. I’ve tried this a few times, but didn’t quite get the yogurt to ferment at all. Since then, I found that you can also get the fermentation started by simply adding a tablespoon of an organic store-bought yogurt that already contains live cultures. The pre-existing bacteria will cultivate the fresh batch of chickpea yogurt and your fermentation is underway.
Endless Yogurt
Once your own yogurt is active, you can use it to ferment the next batch, meaning that you theoretically only need to buy the store-bought yogurt once. Just make sure to do this within the recommended storage time to avoid spoilage.
Locally Grown Legumes
One of the exciting possibilities of this yogurt is that we can use locally grown legumes to make it. However, different growing conditions result in different properties. I found that if I use British-grown chickpeas from Hodmedods, I need to add around 25% less water to achieve a creamy texture. So it’s really a matter of experimenting and finding the right ratio for the crop you’re using.
Dired vs Canned Chickpeas
Unfortunately, you cannot use canned chickpeas for this. Since they are pre-boiled, they will lack some of the starches and properties to set the liquid into a yogurt. Always use dried chickpeas for this method.
Chickpeas & Soil Health
Chickpeas are an excellent booster for soil health, which means every time you eat these locally grown legumes, you basically cut down your carbon footprint and directly support nature close to you. Benefits of growing chickpeas include:
- Nitrogen fixation: Chickpeas are legumes that have the ability to fix atmospheric nitrogen into the soil through symbiotic relationships with nitrogen-fixing bacteria. This process increases soil fertility and reduces the need for synthetic fertilisers, which can harm soil health in the long run.
- Soil structure improvement: Chickpea roots have a taproot system that can penetrate deep into the soil, improving soil structure and increasing water infiltration. This can prevent soil erosion and improve overall soil health.
- Organic matter addition: Chickpea plants produce large amounts of organic matter, which can improve soil structure, increase water holding capacity, and provide essential nutrients to soil organisms.
- Pest control: Chickpeas contain natural compounds that can repel pests, such as nematodes and soil-borne diseases, reducing the need for synthetic pesticides that can harm soil health.
Storage
Keep for 3-4 days in fridge in an airtight container.
Makes around 500g yogurt
Ingredients
Chickpea Yogurt
-
700ml water
-
1 heaped tbsp organic yogurt with live cultures (30g)
Sweet Yogurt
-
1 batch of chickpea yogurt
-
2 tbsp maple syrup
-
1 tsp vanilla bean paste
Savoury Yogurt Dip
-
1 batch of chickpea yogurt
-
1 cucumber
-
1 tbsp salt (14g)
-
2 garlic cloves
-
30g mint
-
2 tbsp lemon juice
Method
Soak the chickpeas in at least 1l of water overnight.
The next day, drain them and add to a blender along with the 700ml of water. Blend for around 20 seconds until almost smooth. It’s fine if it’s a little grainy.
Place a fine sieve in a saucepan and line it with some cheesecloth, then pour in the blended chickpeas and squeeze out as much liquid as possible. You might have to do this in stages. You can discard the leftover pulp, or use it to thicken stews, soups or even mix it into bread doughs like this Sourdough Rye.
Give the liquid a whisk to loosen any of the starches and proteins that might have sunk to the bottom of the pan. Then bring it to a gentle boil, whisking often. Turn the heat to low and keep simmering until the mixture has thickened into a creamy pudding (3-4 minutes). Then simmer for another 4-5 minutes while whisking every now and then. Don’t be tempted to cook it for less, since heating the raw chickpeas properly will make them digestible. Turn off the heat and transfer the thickened liquid to a fermentation-safe bowl (glass, stone or approved stainless steel), before letting it cool down to room temperature (around 2 hours).
Remove any skin that might have formed on top, then stir in the organic yogurt of your choice. Cover the bowl with a plate and leave it to ferment for another 8 – 16 hours in a warm place until it tastes slightly tangy. If the ambient temperature is quite cold, you can keep it in the oven with just the light setting switched on for some of that time.
Once it tastes tangy, your yogurt is ready. You can blend it in a food processor for a smoother texture and store it in the fridge until using. The tangy flavour will continue to develop over the next day and it’ll set again, even after blending. Just give it a good stir before using. If you’re making another batch within the storage time, you can now add a tablespoon of the fermented yogurt to kickstart it again.
To make the sweet yogurt, simply stir in the maple syrup and vanilla extract.
For a savoury dip, coarsely grate the cucumber into a bowl and mix with the salt. Leave to sit for 10 minutes to let the salt draw out some of the water. In the meantime, peel and finely grate the garlic. Pick the mint leaves and finely chop them. After 10 minutes, use your hands to squeeze out as much water from the cucumber as you can, then add it to the yogurt along with the grated garlic, chopped mint and lemon juice. Stir together and serve.
Storage: Keep for 3-4 days in fridge in an airtight container.
As an Amazon Associate I receive a small commission from affiliate links on this page.
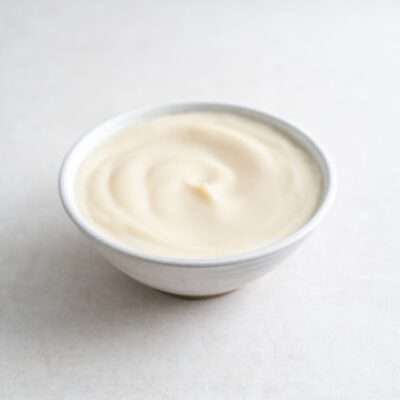
Chickpea Yogurt
Ingredients
Chickpea Yogurt
- 125 g dried organic chickpeas
- 700 ml water
- 1 heaped tbsp organic yogurt with live cultures (30g)
Sweet Yogurt
- 1 batch of chickpea yogurt
- 2 tbsp maple syrup
- 1 tsp vanilla bean paste
Savoury Yogurt Dip
- 1 batch of chickpea yogurt
- 1 cucumber
- 1 tbsp salt (14g)
- 2 garlic cloves
- 30 g mint
- 2 tbsp lemon juice
Instructions
- Soak the chickpeas in at least 1l of water overnight.
- The next day, drain them and add to a blender along with the 700ml of water. Blend for around 20 seconds until almost smooth. It’s fine if it’s a little grainy.
- Place a fine sieve in a sauce pan and line it with some cheesecloth, then pour in the blended chickpeas and squeeze out as much liquid as possible. You might have to do this in stages. You can discard the leftover pulp, or use it to thicken stews, soups or even mix it into bread doughs like this Sourdough Rye.
- Give the liquid a whisk to loosen any of the starches and proteins that might have sunk to the bottom of the pan. Then bring it to a gentle boil, whisking often. Turn the heat to low and keep simmering until the mixture has thickened into a creamy pudding (3-4 minutes). Then simmer for another 4-5 minutes while whisking every now and then. Don’t be tempted to cook it for less, since heating the raw chickpeas properly will make them digestible. Turn off the heat and transfer the thickened liquid to a fermentation-safe bowl (glass, stone or approved stainless steel), before letting it cool down to room temperature (around 2 hours).
- Remove any skin that might have formed on top, then stir in the organic yogurt of your choice. Cover the bowl with a plate and leave it to ferment for another 8 - 16 hours in a warm place until it tastes slightly tangy. If the ambient temperature is quite cold, you can keep it in the oven with just the light setting switched on for some of that time.
- Once it tastes tangy, your yogurt is ready. You can blend it in a food processor for a smoother texture and store it in the fridge until using. The tangy flavour will continue to develop over the next day and it’ll set again, even after blending. Just give it a good stir before using. If you’re making another batch within the storage time, you can now add a tablespoon of the fermented yogurt to kickstart it again.
- To make the sweet yogurt, simply stir in the maple syrup and vanilla extract.
- For a savoury dip, coarsely grate the cucumber into a bowl and mix with the salt. Leave to sit for 10 minutes to let the salt draw out some of the water. In the meantime, peel and finely grate the garlic. Pick the mint leaves and finely chop them. After 10 minutes, use your hands to squeeze out as much water from the cucumber as you can, then add it to the yogurt along with the grated garlic, chopped mint and lemon juice. Stir together and serve.










Thank you for this recipe! I have tried it for the third time and every time gets better! However I’ve got a question – do you know approximate amount of calories / nutrients?
I’m glad you like it so much! Hm, unfortunately not, sorry. It’s a good reminder to set up a tool for my recipes.