")

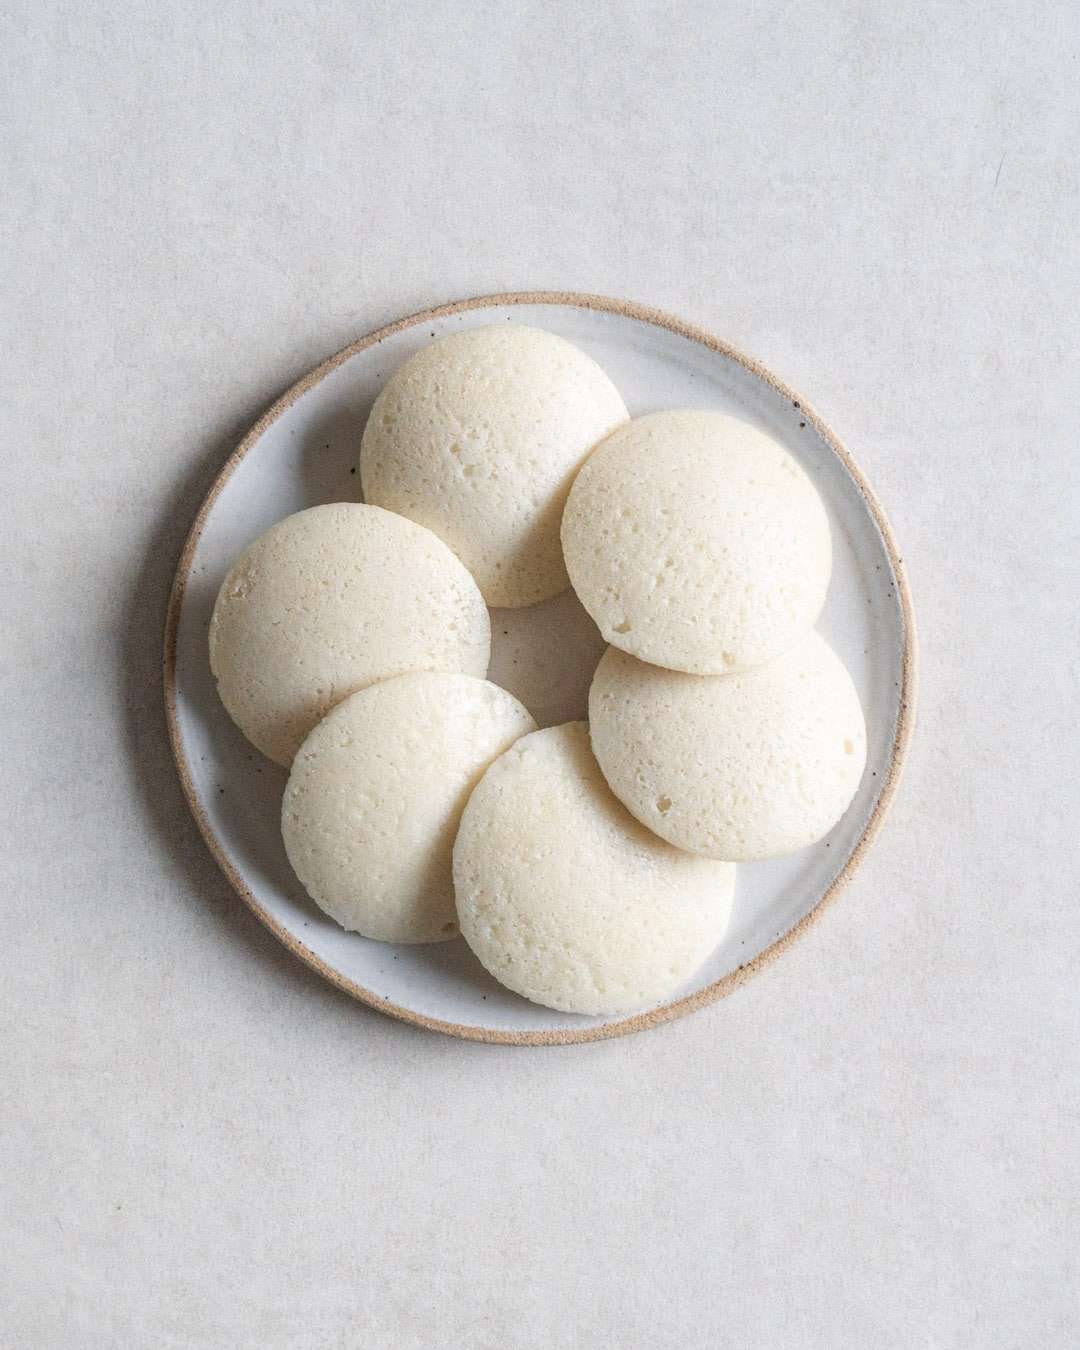
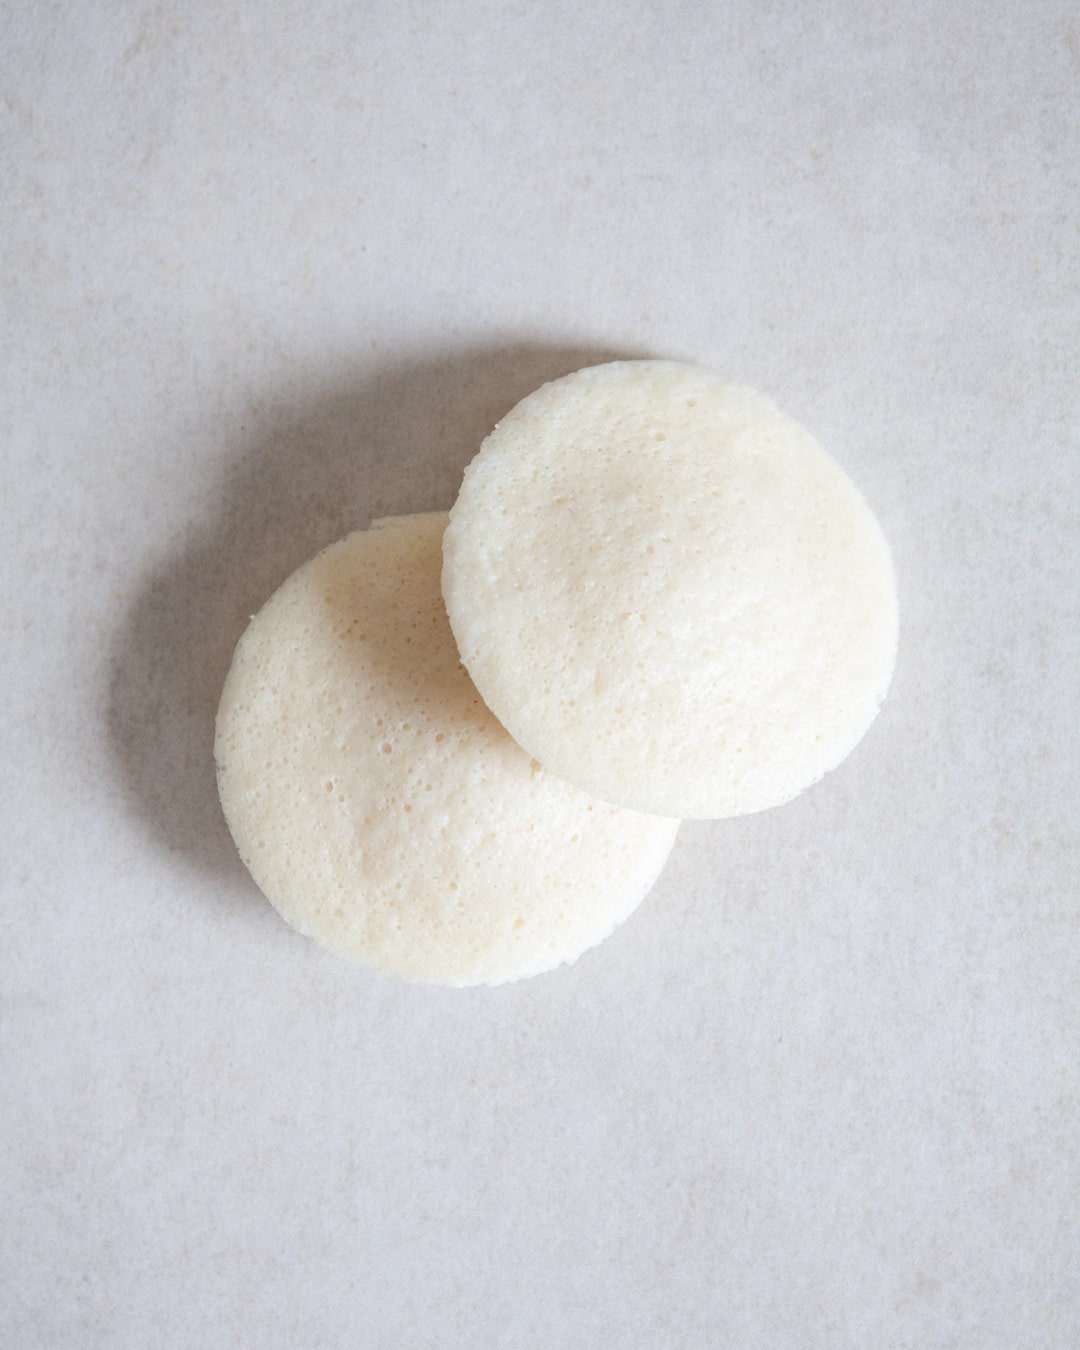
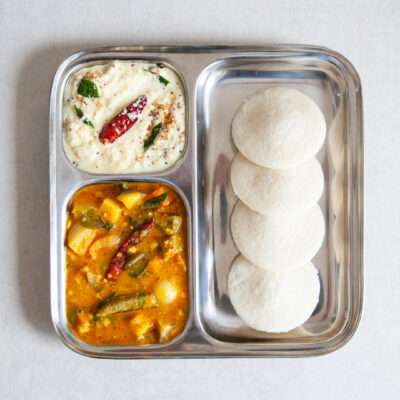
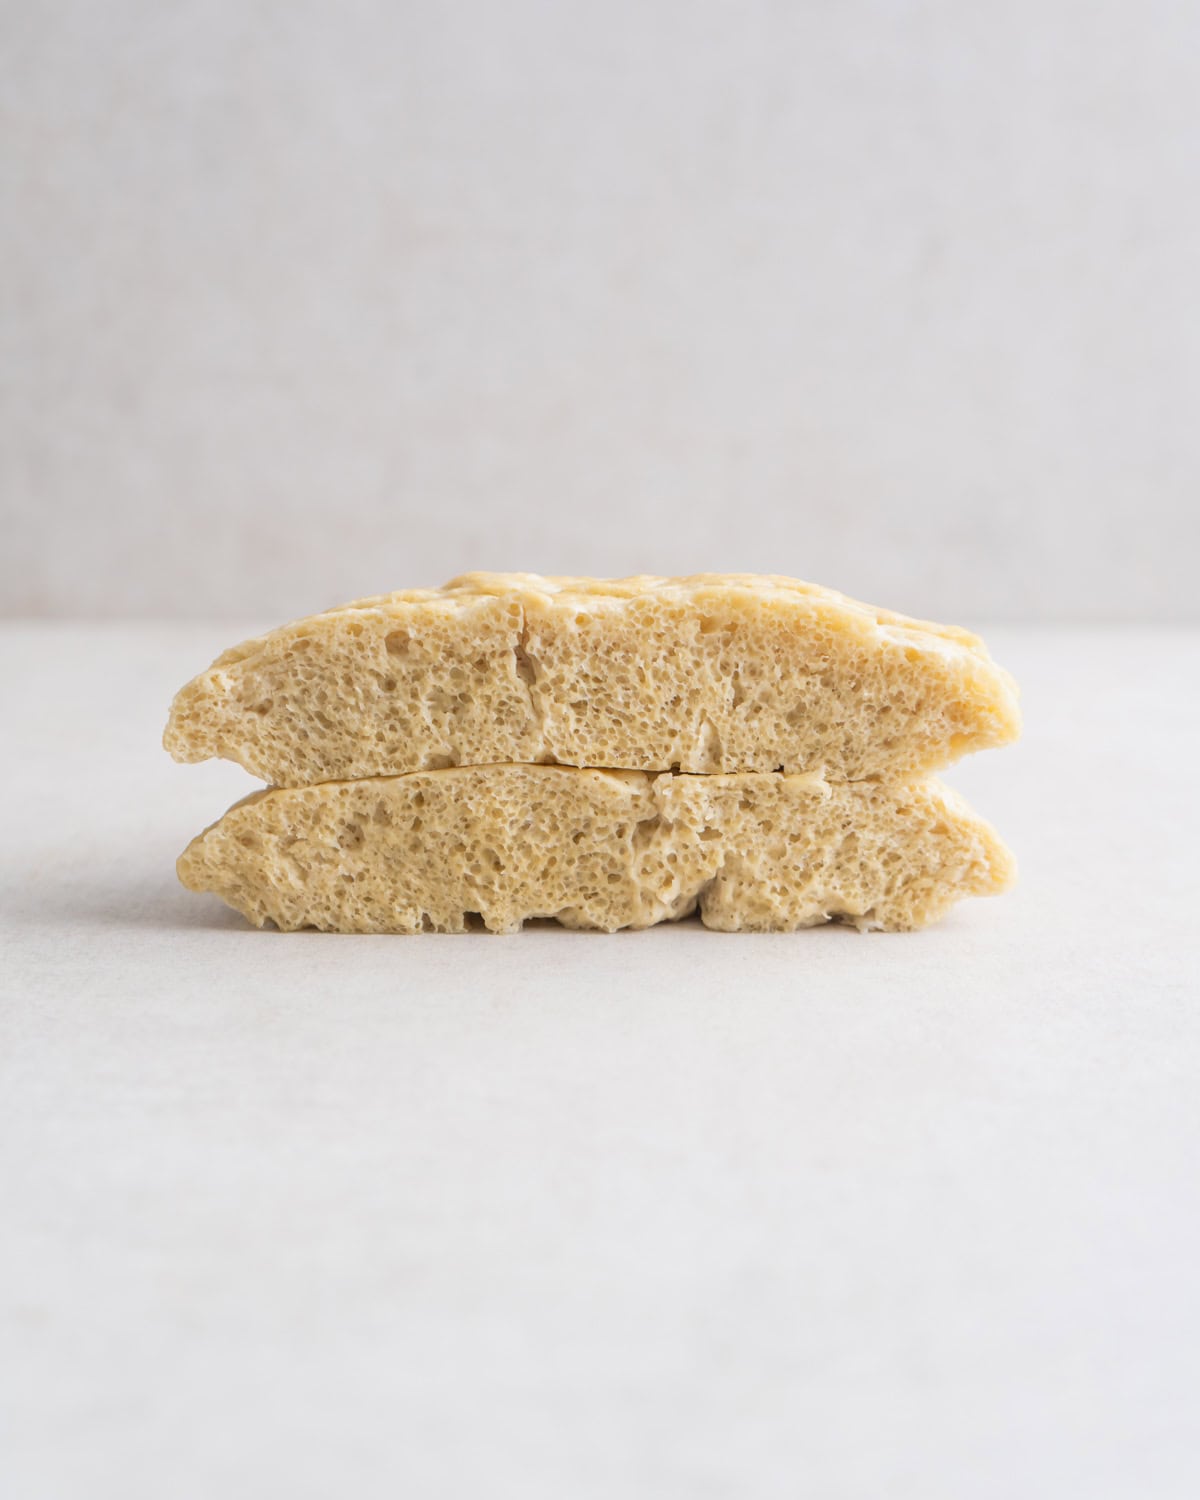
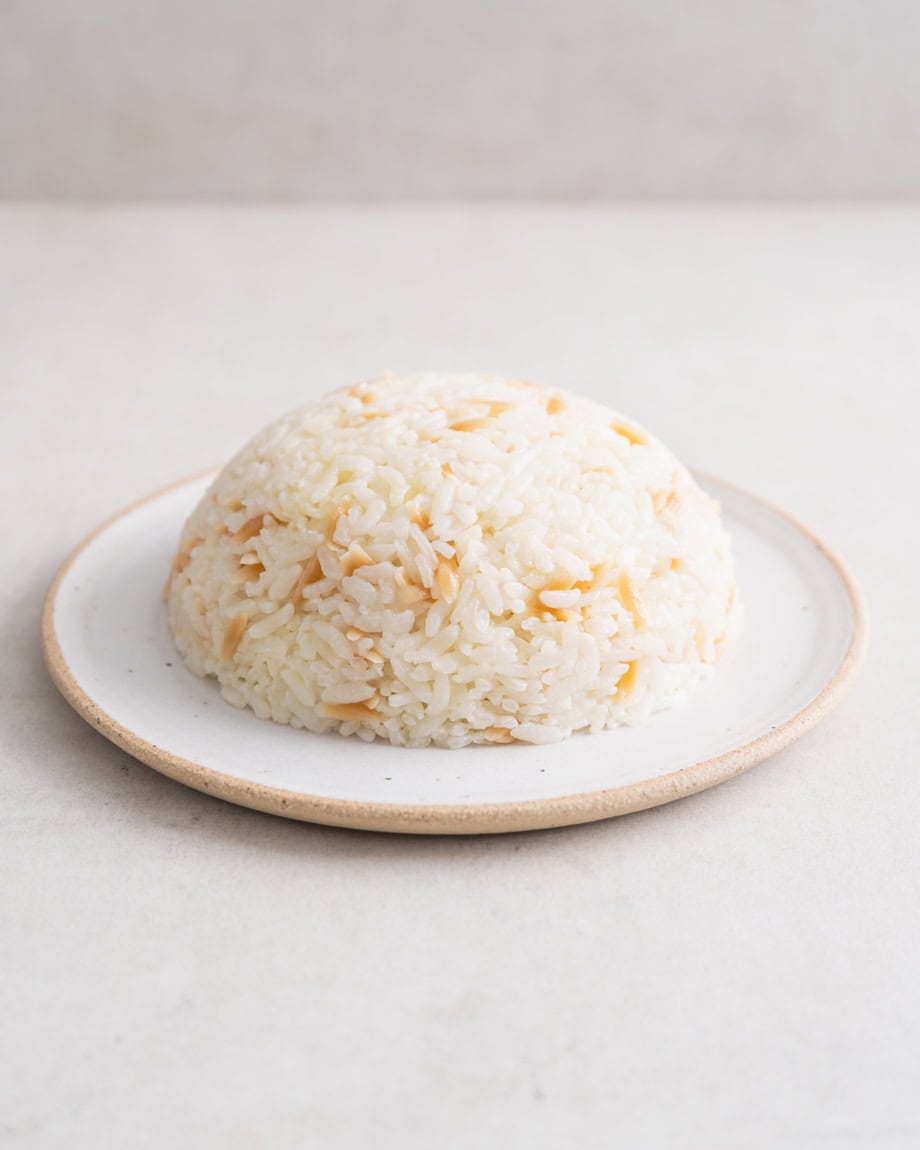
Idli are steamed fluffy rice cakes that are made from a fermented rice and lentil batter. A South Indian specialty, they are traditionally eaten for breakfast, but make a fantastic lunch or dinner that just happens to be vegan, especially when paired with sambar & a coconut chutney. Making idli, sambar and coconut chutney from scratch can take a bit of time, so if you just want to give the idli a go, they work great with any Indian dishes that you’d usually eat with rice.
Besides a pleasant tangy flavour, the fermentation process converts the carbohydrates and proteins in the batter into easier-to-digest forms and increases the bioavailability of certain nutrients, such as folate, iron and zinc. Which is one of the reasons why Idli are often named one of India’s healthiest breakfasts.
Fermenting the batter
Fermenting idli batter can be a bit tricky, especially in colder climates, so here are a few tricks that helped me.
- Adding salt after the fermentation: I usually always added salt while mixing the batter, knowing that salt would limit the growth of bacteria that could negatively impact the fermentation. However, salt also slows down the fermentation. When I recently made Idli during the colder winter months, my batter simply wouldn’t rise. I tried everything, but the only change that made a difference, was adding the salt after the fermentation while also following the usual steps. That way, the batter fermented beautifully and doubled in volume.
- Don’t wash the urad dal too often. I only rinse it once, top it up with fresh water and then leave it to soak. The dal contains most of the natural yeasts that will kick off the fermentation and washing it too often might remove them.
- Fenugreek seeds and poha are optional, but the fenugreek seeds help with the fermentation while the poha makes for a smooth and fluffy batter.
- Use the soaking liquid to grind your batter. Some of the components that help with the fermentation leak into the water during soaking, so I always use the soaking liquid to grind the batter.
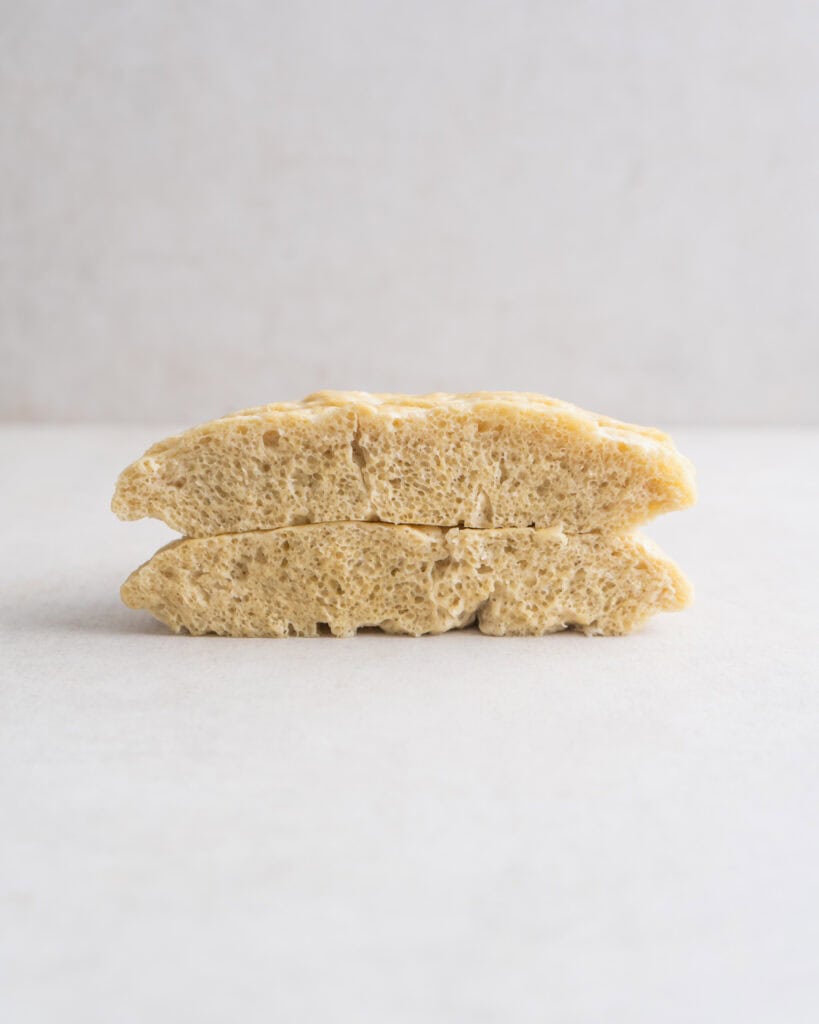
- Aim for a slightly thicker batter. Try not to add more water than advised in the recipe. The pastes might seem thick at first, but they loosen a little when you mix them together with your hand. The final batter should still fall in ribbons when you drizzle it on itself. That way it traps more of the air during the fermentation.
- Keep the batter in a warm spot. You can place it in the oven with just the light switched on (I turn it off during the night to be on the safe side).
Steaming the Idli
To steam the idli, you will need an Idli Stand. Most recipes will also suggest to buy an Idli cooker, but I usually use a pot that is large enough to hold the stand and then just cover it with a lid. If your lid doesn’t have an air hole, make sure to keep it slightly ajar. If you don’t want to buy an Idli Stand, or if you’re reading this too late, you can fry them into mini pancakes with a little oil in a non-stick pan.
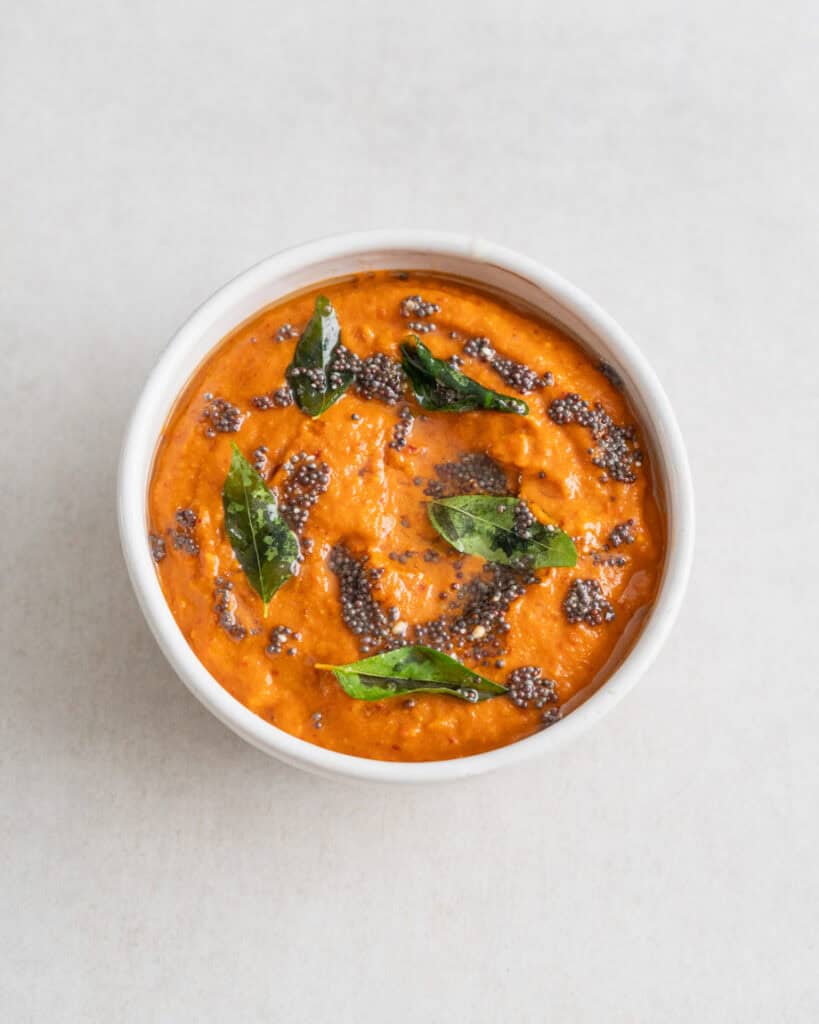
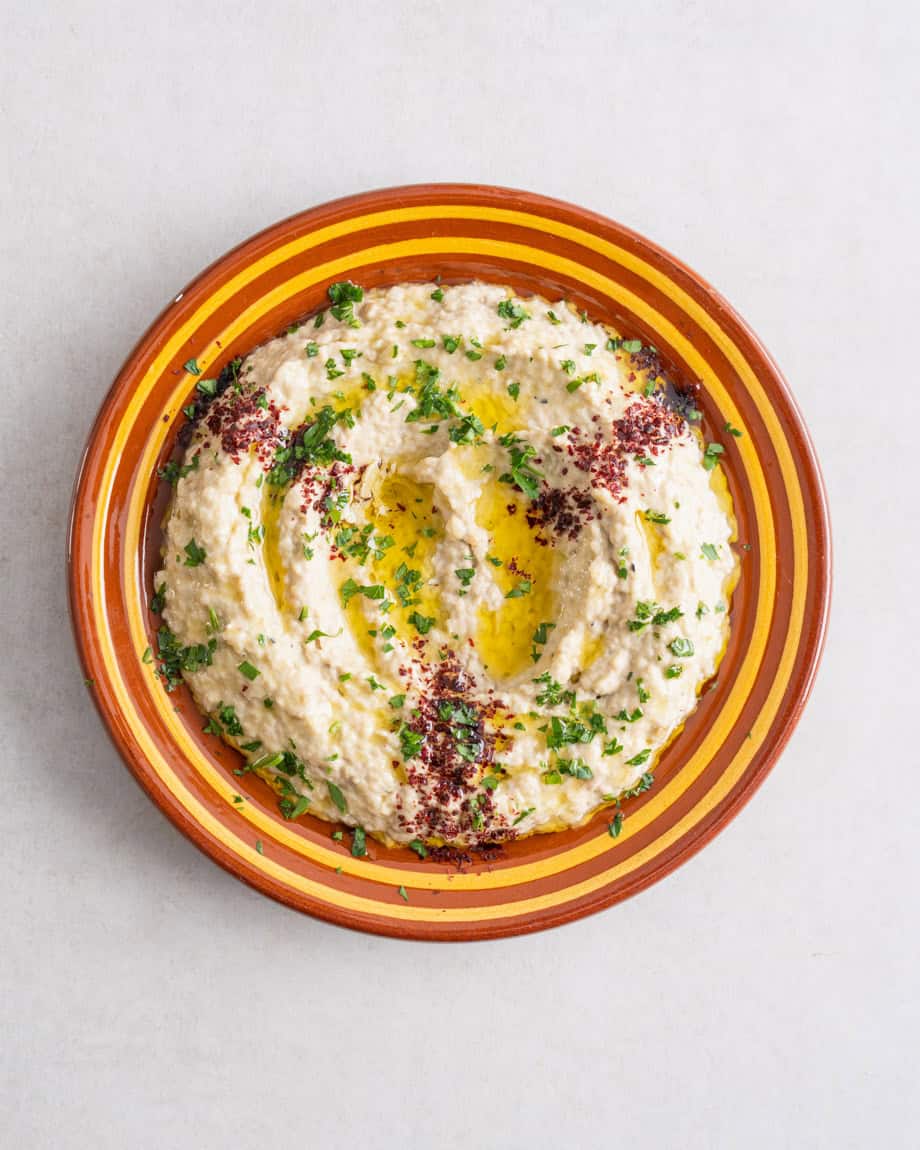
For the Sambar
Follow this recipe to make the Sambar.
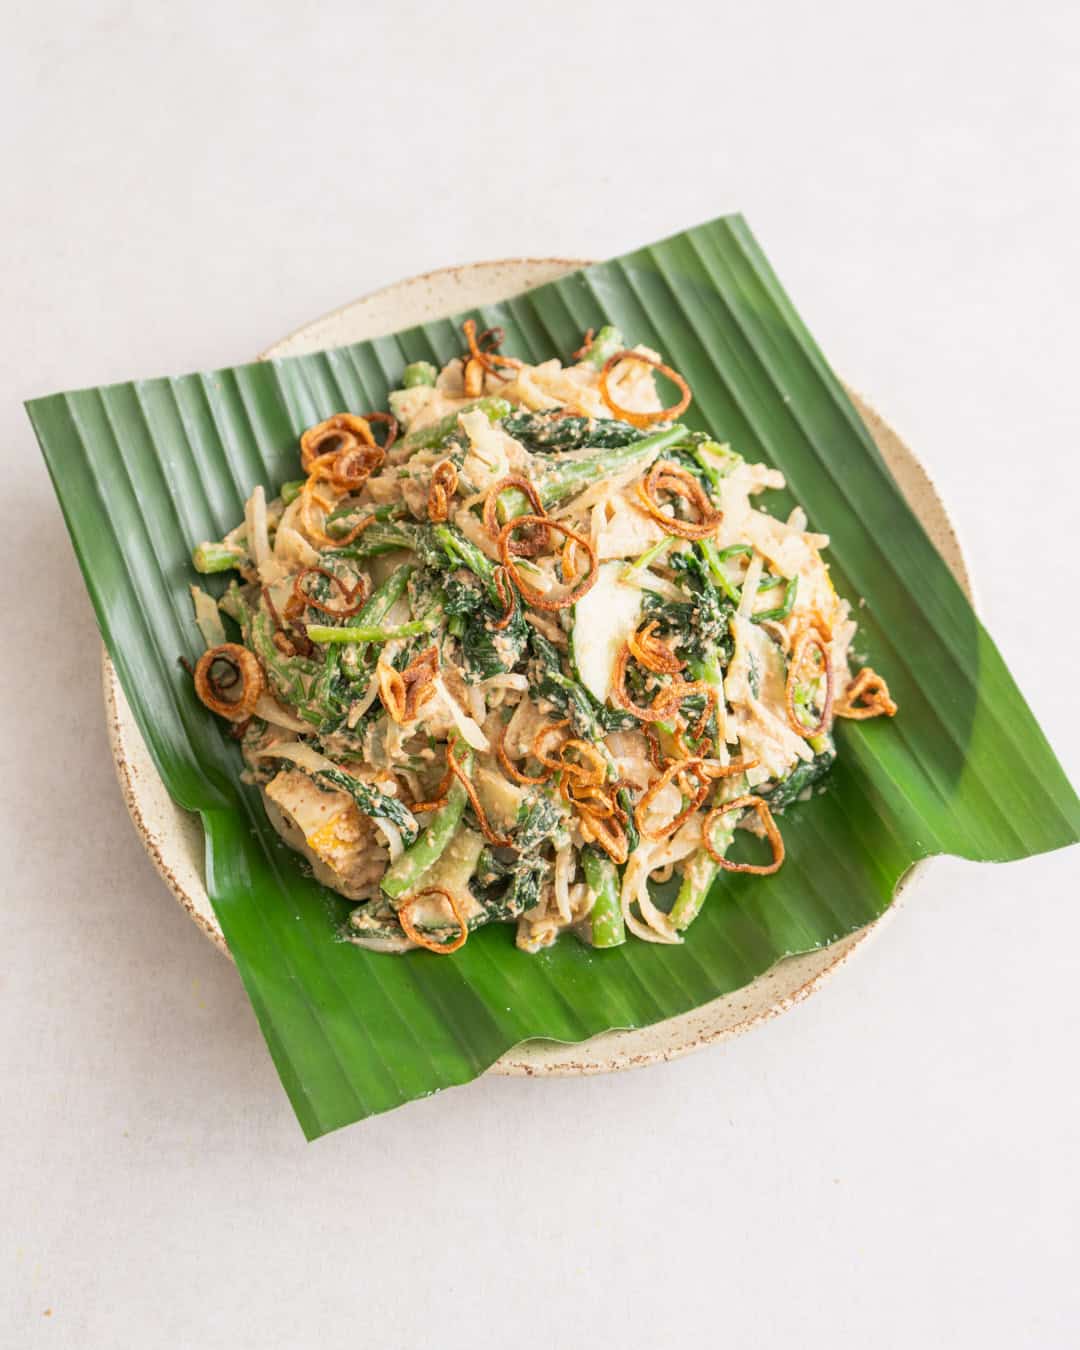
For the Coconut Chutney
Follow this recipe to make the Coconut Chutney.
Storage
You can keep the batter in the fridge for up to 5 days and make fresh Idli whenever you’re ready. Store cooked idli in an airtight container in the fridge for 2-3 days, however they will loose their fluffiness. Leftovers taste great when broken into pieces and fried with a little oil until golden.
serves 4
Ingredients
-
300g idli rice
-
100g urad dal (husked black gram)
-
30g poha (flattened rice)
-
1 tsp fenugreek seeds
-
1 tsp salt
Method
Wash the rice several times in water, cover with fresh water and soak for 3-4 hours.
In a separate bowl, wash the urad dal, poha and fenugreek just one time in water (otherwise you remove too much of the natural yeasts), then cover with fresh water and soak for 3-4 hours.
Drain the rice but save the water. Add the rice to a blender (I used my Vitamix E310) along with 130-150ml of the soaking water. Blend into a fine but slightly grainy paste, only adding more water if it doesn’t blend at all. The paste should fall in thick ribbons if you drizzle it with a spoon on itself. The texture should be similar to a coarse cornmeal. Transfer the paste to a large bowl or pan.
Drain the urad dal, poha and fenugreek seeds but save the water. Add the drained ingredients to a blender along with 80-120ml of the soaking water. Blend into a very smooth paste, trying not to add much more water. To check the consistency, add a teaspoon of the batter to a bowl of water. It should float. If it does, transfer it to the bowl with the rice paste and mix well with your hands to bring it all together and kick off the fermentation process. Cover the bowl (but not air-tight) and leave to ferment for around 12-24 hours in a warm place. I usually keep it in the oven with just the light switched on (turn it off during the night). If the ambient temperature is very warm, it might already ferment after around 8 hours. The fermented batter should have risen in volume, smell slightly tangy and have tiny air bubbles all over the surface. If it hasn’t fermented yet, leave it a little longer. If it has fermented, move the bowl to the fridge until you use the batter.
To make the idli, pour enough water into a saucepan to generously cover the bottom without touching the idli stand (see Steaming the idli note above). Bring to a simmer.
In the meantime, grease the idli moulds with some oil. Add the salt to the batter and gently mix it through, making sure not to stir out all of the air. Then fill 3/4th of each mould with the batter. Place the moulds into the pan with water and bring the water to a boil. Then turn the heat to medium, cover the pan with a lid (if the lid doesn’t have an air hole, keep it slightly ajar) and steam the idli for 10 minutes. Turn off the heat and leave them to steam for another 2 minutes or until a skewer comes out clean. Take the moulds out of the pan and let them rest for a moment. Then use a wet knife to remove them.
Storage: Keep the batter in the fridge for up to 5 days. Store cooked idli in an airtight container in the fridge for 2-3 days. Leftovers taste great when broken into pieces and fried with a little oil until golden.
Ideally served alongside this Sambar & this Coconut Chutney.
**I receive a small commission from affiliate links on this page**
Idli Sambar with Coconut Chutney
Ingredients
- 300 g idli rice
- 100 g urad dal (husked black gram)
- 30 g poha (flattened rice)
- 1 tsp fenugreek seeds
- 1 tsp salt
Instructions
- Wash the rice several times in water, cover with fresh water and soak for 3-4 hours.
- In a separate bowl, wash the urad dal, poha and fenugreek just one time in water (otherwise you remove too much of the natural yeasts), then cover with fresh water and soak for 3-4 hours.
- Drain the rice but save the water. Add the rice to a blender (I used my Vitamix E310) along with 130-150ml of the soaking water. Blend into a fine but slightly grainy paste, only adding more water if it doesn’t blend at all. The paste should fall in thick ribbons if you drizzle it with a spoon on itself. The texture should be similar to a coarse cornmeal. Transfer the paste to a large bowl or pan.
- Drain the urad dal, poha and fenugreek seeds but save the water. Add the drained ingredients to a blender along with 80-120ml of the soaking water. Blend into a very smooth paste, trying not to add much more water. To check the consistency, add a teaspoon of the batter to a bowl of water. It should float. If it does, transfer it to the bowl with the rice paste and mix well with your hands to bring it all together and kick off the fermentation process. Cover the bowl (but not air-tight) and leave to ferment for around 12-24 hours in a warm place. I usually keep it in the oven with just the light switched on (turn it off during the night). If the ambient temperature is very warm, it might already ferment after around 8 hours. The fermented batter should have risen in volume, smell slightly tangy and have tiny air bubbles all over the surface. If it hasn’t fermented yet, leave it a little longer. If it has fermented, move the bowl to the fridge until you use the batter.
- To make the idli, pour enough water into a saucepan to generously cover the bottom without touching the idli stand (see Steaming the idli note above). Bring to a simmer.
- In the meantime, grease the idli moulds with some oil. Add the salt to the batter and gently mix it through, making sure not to stir out all of the air. Then fill 3/4th of each mould with the batter. Place the moulds into the pan with water and bring the water to a boil. Then turn the heat to medium, cover the pan with a lid (if the lid doesn’t have an air hole, keep it slightly ajar) and steam the idli for 10 minutes. Turn off the heat and leave them to steam for another 2 minutes or until a skewer comes out clean. Take the moulds out of the pan and let them rest for a moment. Then use a wet knife to remove them.


Food art at its finest! Amazing 👍👍👍👍
South Indians are the real artists!
I made idli and sambar today and found your YouTube video this evening 😊 I have read many idli recipes and had never read to only rinse the urad dal once because of the natural yeasts. Thanks for the tip!
I am really enjoying your videos. I love cooking from around the world.
Oh wonderful, I’m glad it was useful!