")
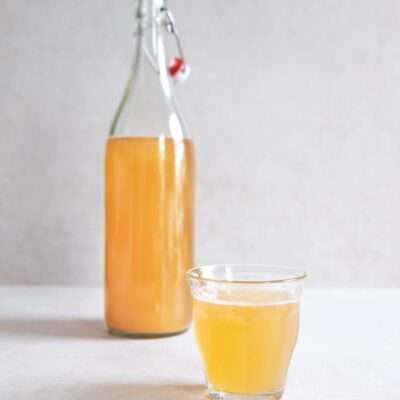
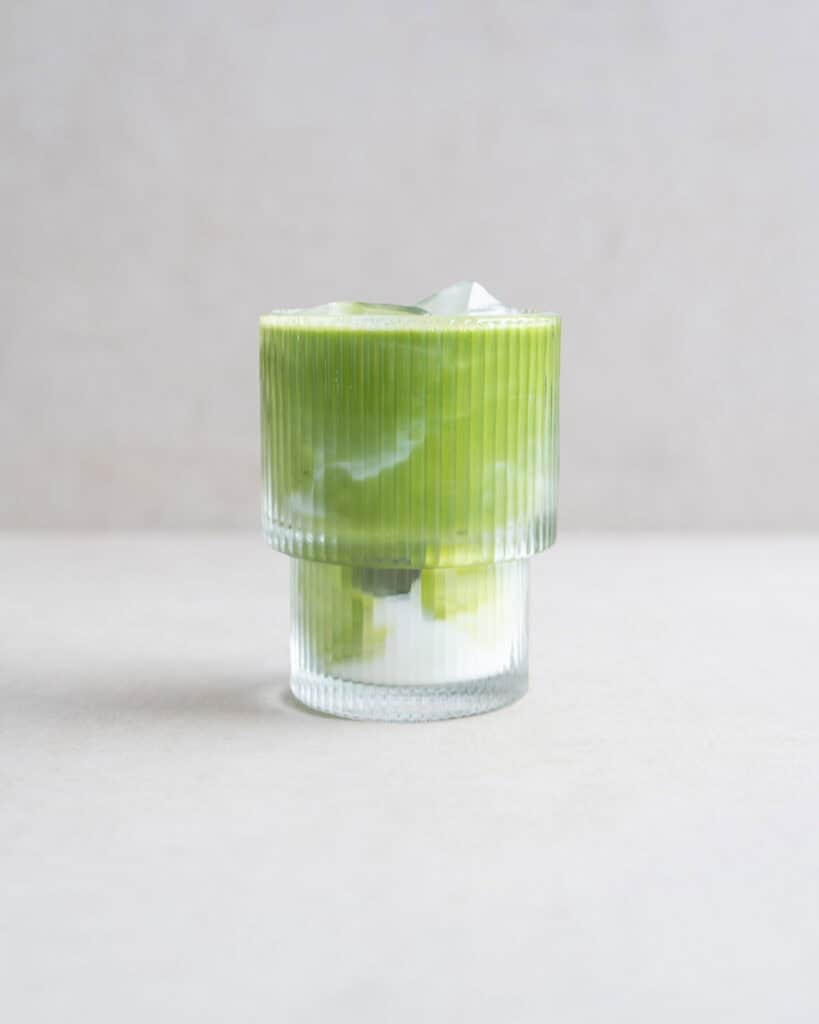
Kombucha is quite a wondrous drink. It is naturally sparking, slightly tangy and mildly sweet. You can flavour it with the seasons, from elderflower to Tarocco oranges, and enjoy it as a refresher on sunnier days or as the base of a cocktail in front of a crackling fire in winter. If you make it at home, it is virtually bottomless. All it takes is tea, sugar, the flavour of your choice and nature’s most genius ingredient, time, to make a new batch.
Despite the recent craze, Kombucha is actually an ancient drink and originated most likely in China more than 2,000 years ago. In essence, it is a fermented liquid that is made with a bacteria culture, a SCOBY (symbiotic culture of bacteria and yeast). The Scoby feasts on sugars and yeasts, a process during which the the liquid ferments and carbonates, giving it its probiotic qualities for which it is praised. The conversion of the sugar also means that although sugar is added, by the time the kombucha is consumed it is quite low in sugar and calories.
These days, you can purchase a Scoby, but it is also rather easy to make your own from scratch. This recipe guides you through the steps of first creating your own Scoby and then using it to ferment your homemade flavoured Kombucha.
To make the Scoby
If you already have a healthy Scoby, you can skip this section.
Ingredients
-
1.5l filtered water
-
100g golden granulated sugar
-
1 tbsp (6g or 4 bags) black tea
-
250ml raw, unpasteurised kombucha
Method
It’s best to start early in your day to allow time for the tea to cool down. Bring the water to a rolling boil. Turn off the heat and stir in the sugar and tea until the sugar is fully dissolved. Then leave the water to cool down to room temperature (this can take a few hours).
When the tea has cooled down, strain it into a large glass jar and pour in the kombucha. Raw kombucha will usually have its own Scoby sediment in the bottle, so make sure to add it as well to speed up the fermentation. Give it a stir, then cover the jar with a layer of cheesecloth and leave for around 3-4 weeks. At this stage, it’s important to keep an eye on the batch. After 1-2 weeks, a thin layer will begin to form on the surface. This is your Scoby growing. Once that happens, gently twirl the jar or submerge the layer with a spoon every other day to cover its surface with the liquid to avoid any fungus growing. When the Scoby is fully grown it is much more resistant to harmful bacteria.
After around 4 weeks, the Scoby should have established enough for you to lift it out with your hand. It is time to make your own flavoured kombucha.
Ginger & Lemon Kombucha
Ingredients
-
1.5l filtered water
-
100g golden granulated sugar + 1 tsp
-
1 tbsp (6g or 4 bags) black tea
-
30 ml (2 tbsp) lemon juice
-
40g ginger
Method
It’s best to start early in your day to allow time for the tea to cool down. Bring the water to a rolling boil. Turn off the heat and stir in the 100g of sugar and the tea until the sugar is fully dissolved. Then leave the water to cool down to room temperature (this can take a few hours).
Set aside 250 ml of your previous kombucha batch (or the liquid you grew the scoby in) along with the scoby. Make sure to keep the jar containing the rest of the fermented liquid.
To the jug of a small blender, add the lemon juice, ginger and 5 tbsp of water and blend until smooth. Strain the liquid into the jar containing the rest of the fermented liquid along with the remaining sugar. Give it a good stir, then strain it through a funnel into a tall glass bottle with an airtight flip-top, leaving at least 2 cm head room in the bottle. Close the bottle and leave to carbonate for 3-7 days in a dark spot without opening it. Move the bottle to the fridge to stop the fermentation and carbonation. The fermentation speed depends on many things such as the ambient temperature (the warmer = the quicker) as well as the bacteria and yeasts that exist in the bottle.
Careful! We’re only adding liquid to flavour the kombucha. Other recipes will ask you to add pieces of fruit or aromatics like ginger to the bottle, which contain much more natural yeasts and will speed up the fermentation tremendously. If you do that, you need to move the kombucha to the fridge much earlier or you risk the bottle exploding. To be on the safe side, develop a feeling for how your batch ferments by letting the bottle “burp” (opening the flip-top) every other day and thereby checking the carbonation. You can also fill a plastic bottle with the kombucha. Once the bottle feels rock hard, it is ready to be moved to the fridge.
Now use the cooled tea, the leftover kombucha liquid and the Scoby to make another batch of kombucha. Make sure that the tea has cooled down enough or the heat might kill the bacteria. Strain the tea into a large glass jar and pour in the reserved liquid followed by the scoby. Cover the jar with a cheesecloth and leave to ferment for 7 – 10 days. Keep tasting the kombucha after day 7 until it has a pleasant balance of sweetness and tartness. The speed is again dependent on the same factors as above. When the batch is ready, you can continue with step 1.
Homemade Kombucha
Ingredients
For the scoby
- 1.5 l filtered water
- 100 g golden granulated sugar
- 1 tbsp (6g or 4 bags) black tea
- 250 ml raw, unpasteurised kombucha
Ginger & lemon kombucha
- 1.5 l filtered water
- 100 g golden granulated sugar + 1 tsp
- 1 tbsp (6g or 4 bags) black tea
- 30 ml (2 tbsp) lemon juice
- 40 g ginger
Instructions
For the scoby
- It’s best to start early in your day to allow time for the tea to cool down. Bring the water to a rolling boil. Turn off the heat and stir in the sugar and tea until the sugar is fully dissolved. Then leave the water to cool down to room temperature (this can take a few hours).
- When the tea has cooled down, strain it into a large glass jar and pour in the kombucha. Raw kombucha will usually have its own Scoby sediment in the bottle, so make sure to add it as well to speed up the fermentation. Give it a stir, then cover the jar with a layer of cheesecloth and leave for around 3-4 weeks. At this stage, it’s important to keep an eye on the batch. After 1-2 weeks, a thin layer will begin to form on the surface. This is your Scoby growing. Once that happens, gently twirl the jar or submerge the layer with a spoon every other day to cover its surface with the liquid to avoid any fungus growing. When the Scoby is fully grown it is much more resistant to harmful bacteria.
- After around 4 weeks, the Scoby should have established enough for you to lift it out with your hand. It is time to make your own flavoured kombucha.
Ginger & lemon kombucha
- It’s best to start early in your day to allow time for the tea to cool down. Bring the water to a rolling boil. Turn off the heat and stir in the 100g of sugar and the tea until the sugar is fully dissolved. Then leave the water to cool down to room temperature (this can take a few hours).
- Set aside 250 ml of your previous kombucha batch (or the liquid you grew the scoby in) along with the scoby. Make sure to keep the jar containing the rest of the fermented liquid.
- To the jug of a small blender, add the lemon juice, ginger and 5 tbsp of water and blend until smooth. Strain the liquid into the jar containing the rest of the fermented liquid along with the remaining sugar. Give it a good stir, then strain it through a funnel into a tall glass bottle with an airtight flip-top, leaving at least 2 cm head room in the bottle. Close the bottle and leave to carbonate for 3-7 days in a dark spot without opening it. Move the bottle to the fridge to stop the fermentation and carbonation. The fermentation speed depends on many things such as the ambient temperature (the warmer = the quicker) as well as the bacteria and yeasts that exist in the bottle.Careful! We’re only adding liquid to flavour the kombucha. Other recipes will ask you to add pieces of fruit or aromatics like ginger to the bottle, which contain much more natural yeasts and will speed up the fermentation tremendously. If you do that, you need to move the kombucha to the fridge much earlier or you risk the bottle exploding. To be on the safe side, develop a feeling for how your batch ferments by letting the bottle “burp” (opening the flip-top) every other day and thereby checking the carbonation. You can also fill a plastic bottle with the kombucha. Once the bottle feels rock hard, it is ready to be moved to the fridge.
- Now use the cooled tea, the leftover kombucha liquid and the Scoby to make another batch of kombucha. Make sure that the tea has cooled down enough or the heat might kill the bacteria. Strain the tea into a large glass jar and pour in the reserved liquid followed by the scoby. Cover the jar with a cheese cloth and leave to ferment for 7 - 10 days. Keep tasting the kombucha after day 7 until it has a pleasant balance of sweetness and tartness. The speed is again dependent on the same factors as above. When the batch is ready, you can continue with step 1.


0 Comments